How To Install Peel-and-Stick Countertops
Peel-and-stick countertops are a type of laminate product that comes in sticky square sheets. A cheaper and less durable alternative to natural stone countertops, these products come with a few advantages and plenty of drawbacks. Read on to learn how to install peel-and-stick countertops and find out whether it’s really a good idea in the first place.
Why It’s Less Than Ideal
While they may sound like an easy and affordable alternative to natural stone products, peel-and-stick countertops have plenty of disadvantages. For one, they vary widely in terms of quality and durability. While some are reasonably resistant to water and heat, many are easily damaged. They also tend to lift at the corners over time, and many products are easily ripped or gouged.
Underlying adhesives can also wear out over time, especially in areas with extreme weather. When it does, tiles tend to come loose, and homeowners are forced to reattach them over and over until they finally get fed up and pay for a natural stone product.
Peel-and-stick countertop products also tend to look cheap and are easily stained. Most aren’t food-safe and even fewer are able to tolerate high heat.
Unlike natural quartz, granite, or marble, peel-and-stick countertops are not really designed for long-term use. While they make some sense for rental properties in need of low-budget makeovers; they aren’t usually a good option for people who own their own homes.
Step 1: Prep and Clean.
If you’re dead set on installing a peel-and-stick countertop product, you’ll need to thoroughly prepare the underlying surface. Remove any items from your countertop and scrub the surface clean using a degreasing detergent. Use a nylon scrub brush to eliminate dirt, grease and oils. Thoroughly dry the countertop using a clean rag.
Step 2: Tighten Loose Materials.
Carefully inspect your countertop and secure any loose material using an adhesive that’s formulated to work with your existing countertop material. Clamp the loose or peeling pieces with a C-clamp or add weights atop the area to bond the loose portions of the countertop to the substrate.
Step 3: Fill holes.
Fill any and all divots with a quality epoxy repair putty to generate a smooth surface. Fill depressions so they sit slightly above the countertop. Allow the epoxy putty to dry (usually two to three hours) and then use 100-grit sandpaper to level the surface. Use a clean towel to wipe off debris created during sanding.
Step 4: Abrade the Countertop.
Using 100-grit sandpaper, scour the countertop until it feels slightly gritty; this will promote better adhesion for the peel-and-stick tiles.
Step 5: Arrange the Tiles.
Spread your peel-and-stick tiles across the countertop in the configuration you find most desirable. Push the tiles tightly against one another. Continue arranging tiles until you are satisfied with the layout, but leave the protective paper in place on the backsides. If some tiles will not fit perfectly within the limits of the countertop space, mark each one with a grease pencil so you can accurately cut it to fit later.
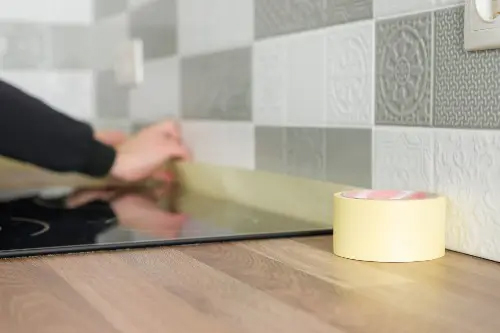
Step 6: Attach Your Tiles.
Peel away the protective paper backing from the first tile and affix it to the countertop. Start along the outer edge and slowly align the tile to the edge of the countertop. Rub a clean rag over the tile while firmly pressing it onto the surface.
Continue in the same manner with each tile, being careful to tightly fit each one to its neighbor. Make precise cuts as necessary using a sharp, new utility knife, and always utilize an accurate metal straightedge to keep your cuts straight.
Step 7: Roll Them Down.
Use a heavy rolling pin to secure the peel-and-stick tiles in place to ensure optimal adhesion to the countertop. This will help ensure that your tiles lay flat and reduce the risk of peeling and curling at the corners.
Step 8: Cover Your Edges.
Use a ruler or tape measure to determine the height of the countertop edge. Use a utility knife and metal straightedge to accurately cut tiles into strips that equal the height of the countertop edge. Peel the paper from the back of the tile strips and affix them to the countertop edge. Rub your thumb over the edges to secure the tile strips in place.
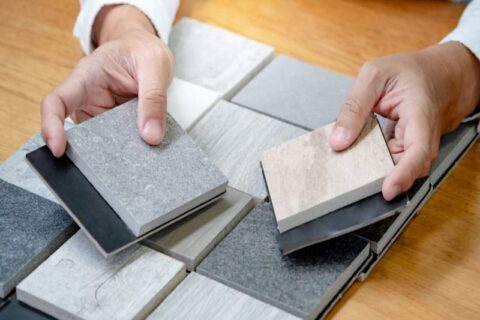
Have your kitchen or bathroom countertops seen better days? Would you like to upgrade to something that will elevate the look of your home? Forget cheap-looking peel-and-stick tiles and consider new natural-stone countertops that are guaranteed to remain resilient and beautiful for years.
Rock Solid has developed a hard-won reputation for being the most skilled and reputable granite counters company. We have the largest selection of natural stone countertops, from granite and soapstone to travertine, limestone, onyx, marble and quartz. Our skilled specialists can match your needs with the exact right product, whether you need practical durability, a stunning finish or understated elegance. Employee-owned, our company never outsources key jobs to subcontractors. When homeowners work with us, they can expect stunning natural stone countertops that stand the test of time.
Are you remodeling your kitchen or bathroom? When it comes to the question of countertops, it can be easy to feel overwhelmed by all the options.…

How has your week been? Unless you just got back from vacation, you’d likely say it was busy. Durango, CO residents lead busy lives, juggling family…